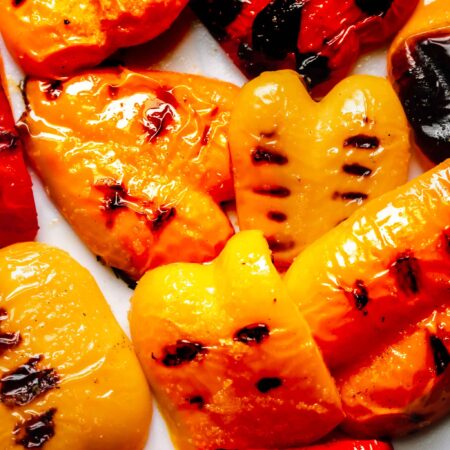
Grilled Bell Peppers
Servings: 6 people
Calories: 62kcal
Learn how to make perfectly tender and blistered Grilled Bell Peppers at home! It’s one of the best and easiest side dishes you can add to burrito bowls, fajitas, or pair with grilled meats.
Print Recipe
Equipment
- Grill
Ingredients
- 4 bell peppers red, yellow, orange, etc.
- 2 Tablespoons olive oil
- Kosher salt + pepper to taste
Instructions
- Preheat a grill or grill pan to medium-high heat.
- While the grill heats, quarter the peppers and remove the seeds.
- Arrange the peppers on a baking sheet and drizzle the skin side with olive oil and sprinkle with a bit of salt and pepper.
- Place the peppers on the grill, skin side down.
- Grill for 10-12 minutes, until charred in spots and the peppers are slightly softened. You may need to do this in batches if working with a grill pan.
- Sprinkle the peppers with additional salt, to taste, and serve immediately or at room temperature. Enjoy.
Notes
Storage
- The grilled peppers will keep in the fridge for up to 5 days.
-
To prep bell peppers for grilling, use a sharp knife to remove the stemmed end and clean out the seeds. Cut the cleaned pepper vertically into 4 pieces.
-
Don’t overcrowd the grill grates. Leave at least a half inch in between each piece. If you’re working with a smaller grill pan, you may need to grill the peppers in batches.
-
Oil free? Omit the olive oil and dry grill the bell peppers. Oil free grilled peppers are more likely to stick, so make sure the grates are clean and very hot before you begin.
-
Want to remove the skins from your peppers? Once your peppers are charred, place them in a large bowl and cover with plastic wrap. Let sit for 5-10 minutes until cool enough to handle, then peel off the charred skin using your hands.
-
No grill or grill pan at home? Try broiling your peppers in the oven instead. Place the peppers (skin side facing up) on a foil-lined baking sheet and place under the preheated broiler until the skin begins to blacken and blister. You can also char them on the flame of a gas stovetop.
Nutrition
Calories: 62kcal | Carbohydrates: 5g | Protein: 1g | Fat: 5g | Saturated Fat: 1g | Polyunsaturated Fat: 1g | Monounsaturated Fat: 3g | Sodium: 3mg | Potassium: 167mg | Fiber: 2g | Sugar: 3g | Vitamin A: 2484IU | Vitamin C: 102mg | Calcium: 6mg | Iron: 0.4mg