

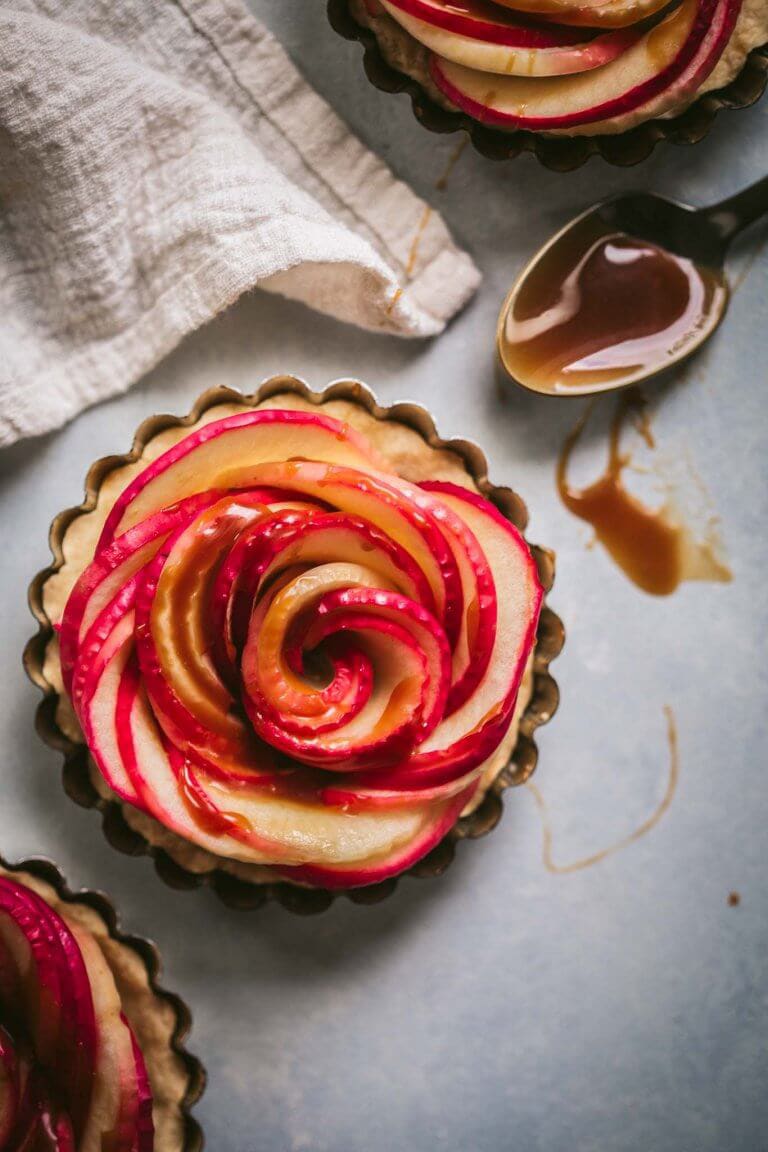
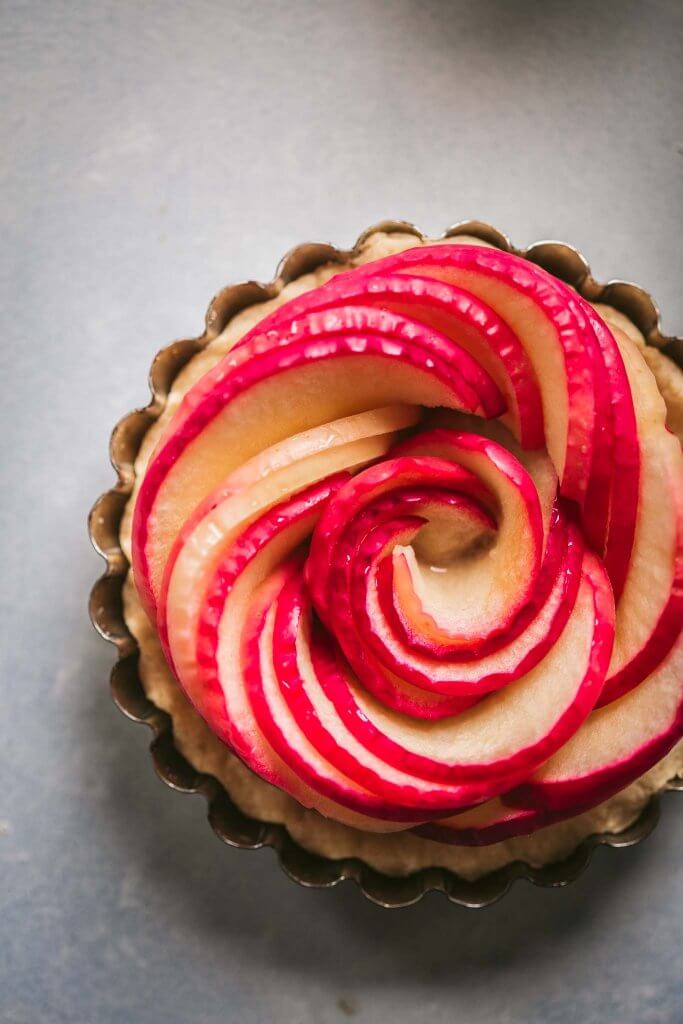
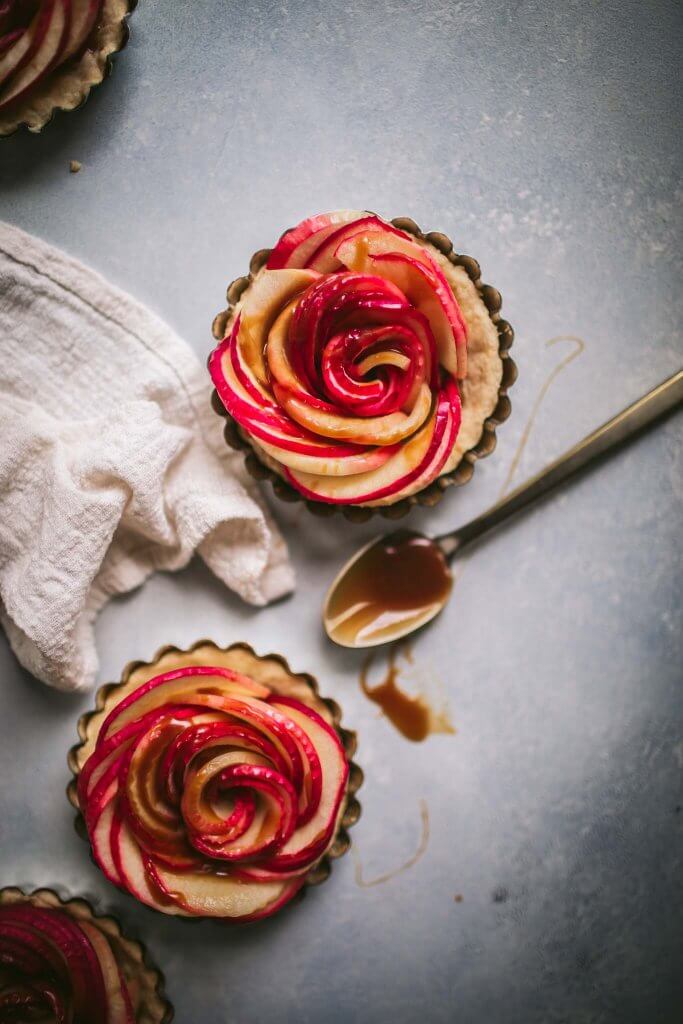
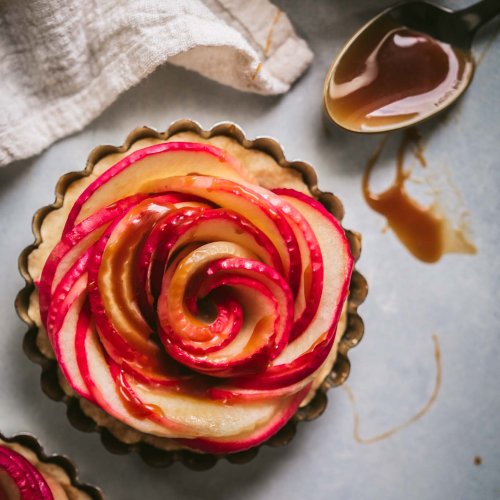
Caramel Apple Tartlets are not only amazingly delicious, but beautiful too! Thin apple slices are arranged to look like a rose and drizzled with a yummy salted caramel sauce.
Here in the Pacific Northwest we have some of the most amazingly delicious and flavorful apples. They’re crunchy and tart, and just begging to be baked into something yummy…
Enter Apple Tartlets with Salted Caramel Sauce.

What better way to show off those beautiful apples?
The crust of these caramel apple tartlets is not overly sweet.
It’s lightly flavored with a bit of vanilla & almond extract and it bakes up perfectly flaky – a bit like a shortbread. The dough for these tartlets comes together easily using your stand mixer, or by hand. But, you can also take a shortcut and use store bought pie crust for this.
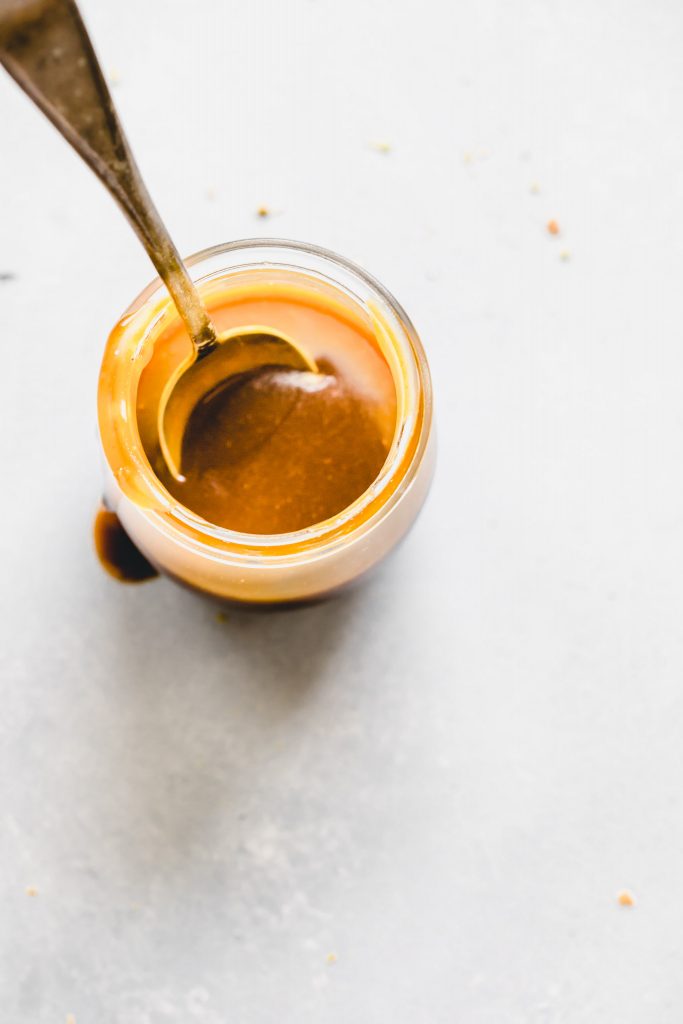
To top it all off, I’m finishing these rose apple tartlets with a my favorite salted caramel sauce.
But we’re not just talking any salted caramel sauce… This time, to kick things up a notch, I spiked the caramel sauce with a splash of apple brandy which I had leftover from these yummy Harvest Moon cocktails. It’s basically awesome.
If you don’t have apple brandy, feel free to use bourbon, regular brandy, or just leave it out. And don’t worry – the salted caramel sauce comes together in just 15-minutes. I promise.
If you’re obsessed with the Omaha Steaks caramel apple tartlets like I am, these taste very similar. They’re just a little… fancified.
Ingredients needed
- Apples – I like to use Honeycrisp, Braeburn or Jonagold red apples for this recipe. You can also use green apples like Granny Smith apples or Golden Delicious.
- Flour, Sugar + Salt
- Butter
- Egg
- Vanilla Extract + Almond Extract – Or, use just one or the other.
- Lemon
- Salted Caramel Sauce – I like to make my own. It takes just 15-minutes (promise)!
Now, you may be wondering, how in the world do you assemble these?
I’m not gonna lie, arranging the apples can be a bit of a challenge. But I’ve got some easy tips to help you out.
How to make them
Make the dough
- In a large mixing bowl, cream together the butter, sugar and salt. Add the egg, vanilla and almond extract and mix well. Slowly add in the flour and mix until just combined.
- Roll the dough into a ball and place on a sheet of plastic wrap. Flatten the ball into a disc, wrap with the plastic wrap, and place in the fridge for 30 minutes to firm it up.
- When ready to use, unwrap your dough and place it on a floured surface. Roll the dough to a thickness of 1/8 inch. Using your tart tins as a guide, cut circles that are about 1 inch wider than the tins. I used a small mixing bowl to make the cut. Press the dough into your tart tin. Pass your rolling pin over the top of the tin to trim the extra dough.
- Alternatively, you can skip the rolling pin and simply press the dough into your tins (skip the fridge if using this method).
- Shortcut: You can also skip making your own dough and use store bought pie crust instead.
Slice the apples
Start by slicing your apples thin. Here are your options for slicing the apples:
- Use a mandoline. Cut your apples in half lengthwise and remove the core. Then thin slice them on your mandoline using the thinnest setting.
- Use a sharp knife. This isn’t my preferred method because it takes time and it’s difficult to get uniform slices, but it will work in a pinch.
- Use a spiralizer attachment. This has basically become my new best friend. Typically I use it for making zoodles, but it’s also amazingly perfect for making these thin apple slices, plus it cores your apple in the process. Just spiralize your apples and then cut them in half to make those half moon shapes. So easy!
Place the apple slices in lemon juice, so they won’t brown.
Soften the apples
Soften the apple slices, so they are pliable enough to wrap around each other. Here’s a couple options:
- Microwave. Heat in the lemon juice mixture for 30 seconds.
- Oven. Bake in a 375-degree oven for 10 minutes.
Make the salted caramel
Here’s a whole post that helps explain the process. It’s easy and comes together in just 15-minutes!
Assemble
Assemble the caramel apple tarts.
- Filling the tartlet shells with a bit of the salted caramel will help to hold the apple slices in place and will act as your “glue.” To start, take a few slices of apple and overlap them in a row, then roll up to form your bud. Then, simply keep adding more slices around and around the bud that you formed. It’s very forgiving and definitely not as difficult as it may look.
Once your apple rose tartlets are assembled, bake them for twenty minutes, then top them with some extra caramel, and let cool a bit. Serve alongside some vanilla bean ice cream, if desired, and enjoy!
How to make ahead & store
- You can prepare these tartlets one day ahead of when you plan to serve them. Simply roll up the apple rose tartlets and store them covered in the fridge. The next day, you can place in the oven and bake as the recipe instructs.
- Store any leftovers tightly covered in the refrigerator for up to three days.
More salted caramel recipes
More dessert recipes
Did you try these caramel apple rose tarts?
If you loved this caramel apple tartlets recipe, I would appreciate it so much if you would leave a star review! Also, be sure to snap a picture of your finished dish and share it with me on Instagram using the hashtag #platingsandpairings and tagging me @platingsandpairings.
For more great Platings and Pairings recipes, be sure to follow me on Instagram, TikTok, Pinterest and Facebook.
Full Recipe
Caramel Apple Tartlets
Equipment
Ingredients
Tart Dough
- 1/2 cup unsalted butter
- 1 3/4 cups flour
- 1/4 cup sugar
- 1 large egg
- 1/2 teaspoon vanilla extract
- 1/4 teaspoon almond extract
- Pinch salt
Apple Filling
- 3-4 red apples
- 3 Tablespoons sugar
- 1 lemon (juiced)
- 3/4 cup 15-minute salted caramel sauce (I added a splash of Applejack brandy)
Instructions
- In a large mixing bowl, cream together the butter, sugar and salt. Add the egg, vanilla and almond extract and mix well. Slowly add in the flour and mix until just combined.
- Roll the dough into a ball and place on a sheet of plastic wrap. Flatten the ball into a disc, wrap with the plastic wrap, and place in the fridge for 30 minutes to firm.
- When ready to use, unwrap your dough and place it on a floured surface. Roll the dough to a thickness of 1/8 inch. Using your tart tins as a guide, cut circles that are about 1 inch wider than the tins. I used a small mixing bowl to make the cut. Press the dough into your tart tin. Pass your rolling pin over the top of the tin to trim the extra dough. Alternatively, you can skip the rolling pin and simply press the dough into your tins (skip the fridge if using this method).
- Preheat your oven to 400 degrees. Place the tart shells in the freezer for 15 minutes while your oven preheats. Using a fork, poke holes in bottom of the tart shells. Place on a baking sheet and bake for 7-10 minutes. Reduce the heat to 350 degrees and bake for an additional 5-7 minutes, until lightly golden. Remove from the oven and let cool.
- Cut your apples in half lengthwise and remove the core. Using the thinnest setting of a mandolin, slice the apples and place in a microwave safe bowl.
- Combine the sugar and lemon juice, and pour over your apples. Heat in the microwave for 30 seconds to slightly soften the apples.
- Cover the bottoms of your tart shells with 1-2 tablespoons of the salted caramel and then begin to roll your apples. I started with one slice, and rolled it into a tight cylinder. I then took additional slices and continued wrapping them around each other until the bundle was about a quarter sized width. I then placed that into carmel coated tart and added more apples, layering the edges. The caramel helps hold the apples in place. Continue until your tart is fully covered.
- Return the tarts to the 350 degree oven and bake for an additional 20-25 minutes.
- Remove from the oven and drizzle with the remaining salted caramel sauce.
- Serve warm or at room temperature with ice cream.
Nutrition
This post was originally published in 2015. It was updated in 2023 to revise the content. The caramel apple roses recipe remains the same.


Leave a Reply